!index_today!: !index_yesterday!: !index_posts!: !index_members!:
价值300元的HomeLand技术社区 商业版GBK
价值199元的二次元动漫C风格门户版1.0商业模板免费下载
价值358元的地方门户|门户模板商业版 GBK
价值358元的N5城市门户系列-V8 商业版-GBK
价值2340元的APP!手机模板 Im Dream全功能版3.12
论坛昵称插件 2.5-3.1新版
价值150元新浪微博v2接口插件商业版
【DSU】VIP中心X2.5以上版本
价值1万元的IMMWA模板管理中心 2.72
微信九宫格活动营销 4.3插件免费下载
在线QQ头像-QQ邮箱头像-QQ空间头像查询工具 在线查询工具源码免费下载
discuz侧边导航,支持浏览器上下滚动,菜单栏上下滑动,点击返回到顶部和滑到底部
Discuz浮窗多图的DIY单页素材
html5+css3的浮窗单图DIY模块
html5+css3的横排导航列表DIY模块
【实测】discuz论坛帖子随机推荐帖子(每次推荐的帖子不一样)
【原创】帖子发布时间调用及转换为智能时间
【原创】批量更新帖子发布时间(含帖子数据表、发布数据表及缓存数据表)
【原创】给门户专题添加创建一个分类选项,同时修改默认勾选站点导航和站点尾部信息
【原创】判断分类信息中的数据是否为指定数据类型,并根据数据类型在前端自动显示不同网址样式
云服务器全面降价,持续降低用云成本,让算力更普惠,指定云服务器低至0.3元/天
腾讯云上云精选,云服务器、云数据库、COS、CDN、短信等热卖云产品特惠抢购
在线CSS美化工具,实现CSS代码在线格式化和美化。
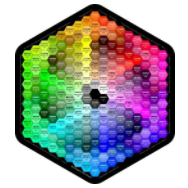
RGB颜色查询对照表,在线颜色选择器,颜色选择器colorpicker,提供多款在线颜色选择器工
使用颜色选择器,在颜色选择器区域内点击并拖动光标,在右侧标出一种颜色。在颜色样本
“带有死亡色彩的颜色”。应该是中日两国对“红色”观念理解的最大差异。因此古代中国
WEB安全色是指在网页上的色彩在不同的显示设备和操作系统上表现基本一致,256色里有40
在线调色板是一款在线颜色选择器,有225个颜色,通过在线选取颜色快速获得RGB颜色值。
网页中色彩的表达使用三种颜色,及红(R)、绿(G)、蓝(B),及通常所说的RGB色彩,它包含
在线图片转WBMP格式转换工具为大家提供在线图片转WBMP格式功能,一键完成png,jpeg,jpg
在线图片转JPEG格式转换工具为大家提供在线图片转JPEG格式功能,一键完成png,jpg,gif,
在线图片转GIF格式转换工具为大家提供在线图片转GIF格式功能,一键完成png,jpeg,jpg,w
在线图片转WEBP格式转换工具为大家提供在线图片转WEBP格式功能,一键完成png,jpeg,jpg
在线图片转PNG格式转换工具为大家提供在线图片转PNG格式功能,一键完成jpeg,jpg,gif,w
 ©2015-2022 tuyuanma.com 版权所有 Sitemap.xml


 站长工具
站长工具
 站长平台
站长平台
 IDC服务商
 域名注册
域名注册
 SEO优化
SEO优化
 广告联盟
广告联盟
 SSL证书
SSL证书
 源码资源
源码资源
 CDN服务
CDN服务
 小程序平台
小程序平台
 开放平台
开放平台
 友情链接
友情链接
 网络硬盘
网络硬盘
 AI平台
AI平台
 图片工具
图片工具
 自媒体平台
自媒体平台


 赣公网安备36112102000036号
 赣ICP备17001544号-10